
Dreamcatcher by Anne Crosby Gaudet (RCM Level 4, List C) - Comprehensive Teaching Guide
Table of Contents
- Getting Started
- Quick Facts
- Sound and Mood
- Sheet Music
- Technical and Musical Challenges
- Teaching Strategies and Lesson Plan Ideas
- Practice Tips and Troubleshooting
- Memory, Tone, and Phrasing Tips
- Theory and Technical Tie-Ins
- Sight-Reading and Ear Training Activities
- Questions and Answers to Prepare with Students
- Additional Resources
- Helpful Sources
- Save on Pinterest
Getting Started
Dreamcatcher is a Royal Conservatory of Music (RCM) Level 4 piano piece that is imaginative and expressive. Composed by Anne Crosby Gaudet, a contemporary Canadian composer and educator from Nova Scotia, this piece offers a dreamy, lyrical sound that stands out in the Level 4 repertoire. It was selected as a List C piece (20th/21st-century repertoire) in the RCM’s Celebration Series, 6th edition, reflecting its pedagogical value and modern charm.
This piece is filled with opportunities for lesson enrichment, regardless of whether you partake in the RCM program. For example, I thoroughly enjoyed reading about how music educator Ashley Danyew created a 4-week study unit highlighting women composers, such as Anne Crosby Gaudet, in celebration of Women’s History Month. Explore Ashley’s detailed summary here.
Quick Facts
- RCM Level: 4 (List C – Contemporary Repertoire)
- Key/Mode: D Mixolydian (D major tonality without a leading tone)
- Style: Lyrical contemporary piece (modern tone poem character)
- Mood: Dreamy, gentle, and warm; evocative of night-time imagery
- Techniques Developed: Cantabile melody voicing, balance between hands, legato pedalling, expressive phrasing (rubato), and familiarity with modal scales
Sound and Mood
Dreamcatcher lives up to its name with a dreamy, reflective mood and a warm, flowing sound. The piece is written in the Mixolydian mode, essentially a major scale with a flattened 7th degree (no leading tone). This modal tonality gives the music a special warmth and openness; there’s a floating quality since the usual tension of a leading tone resolving to tonic is absent. The result is a calm, contemplative atmosphere that feels like a musical daydream.
The dynamic palette of the piece is soft and gentle, with subtle rises and falls. It’s marked “Delicately” as a guiding character. Expect soft tones and an almost lullaby-like quality. Encourage students to listen for the imagery; they might imagine the twilight sky or the soft filter of a real dream catcher hanging in a window. The sound is lyrical and expressive, akin to a short tone poem for piano. For students used to bright, fast pieces, this offers a beautiful change of pace and is an invitation to slow down and play with colour and emotion in their sound.
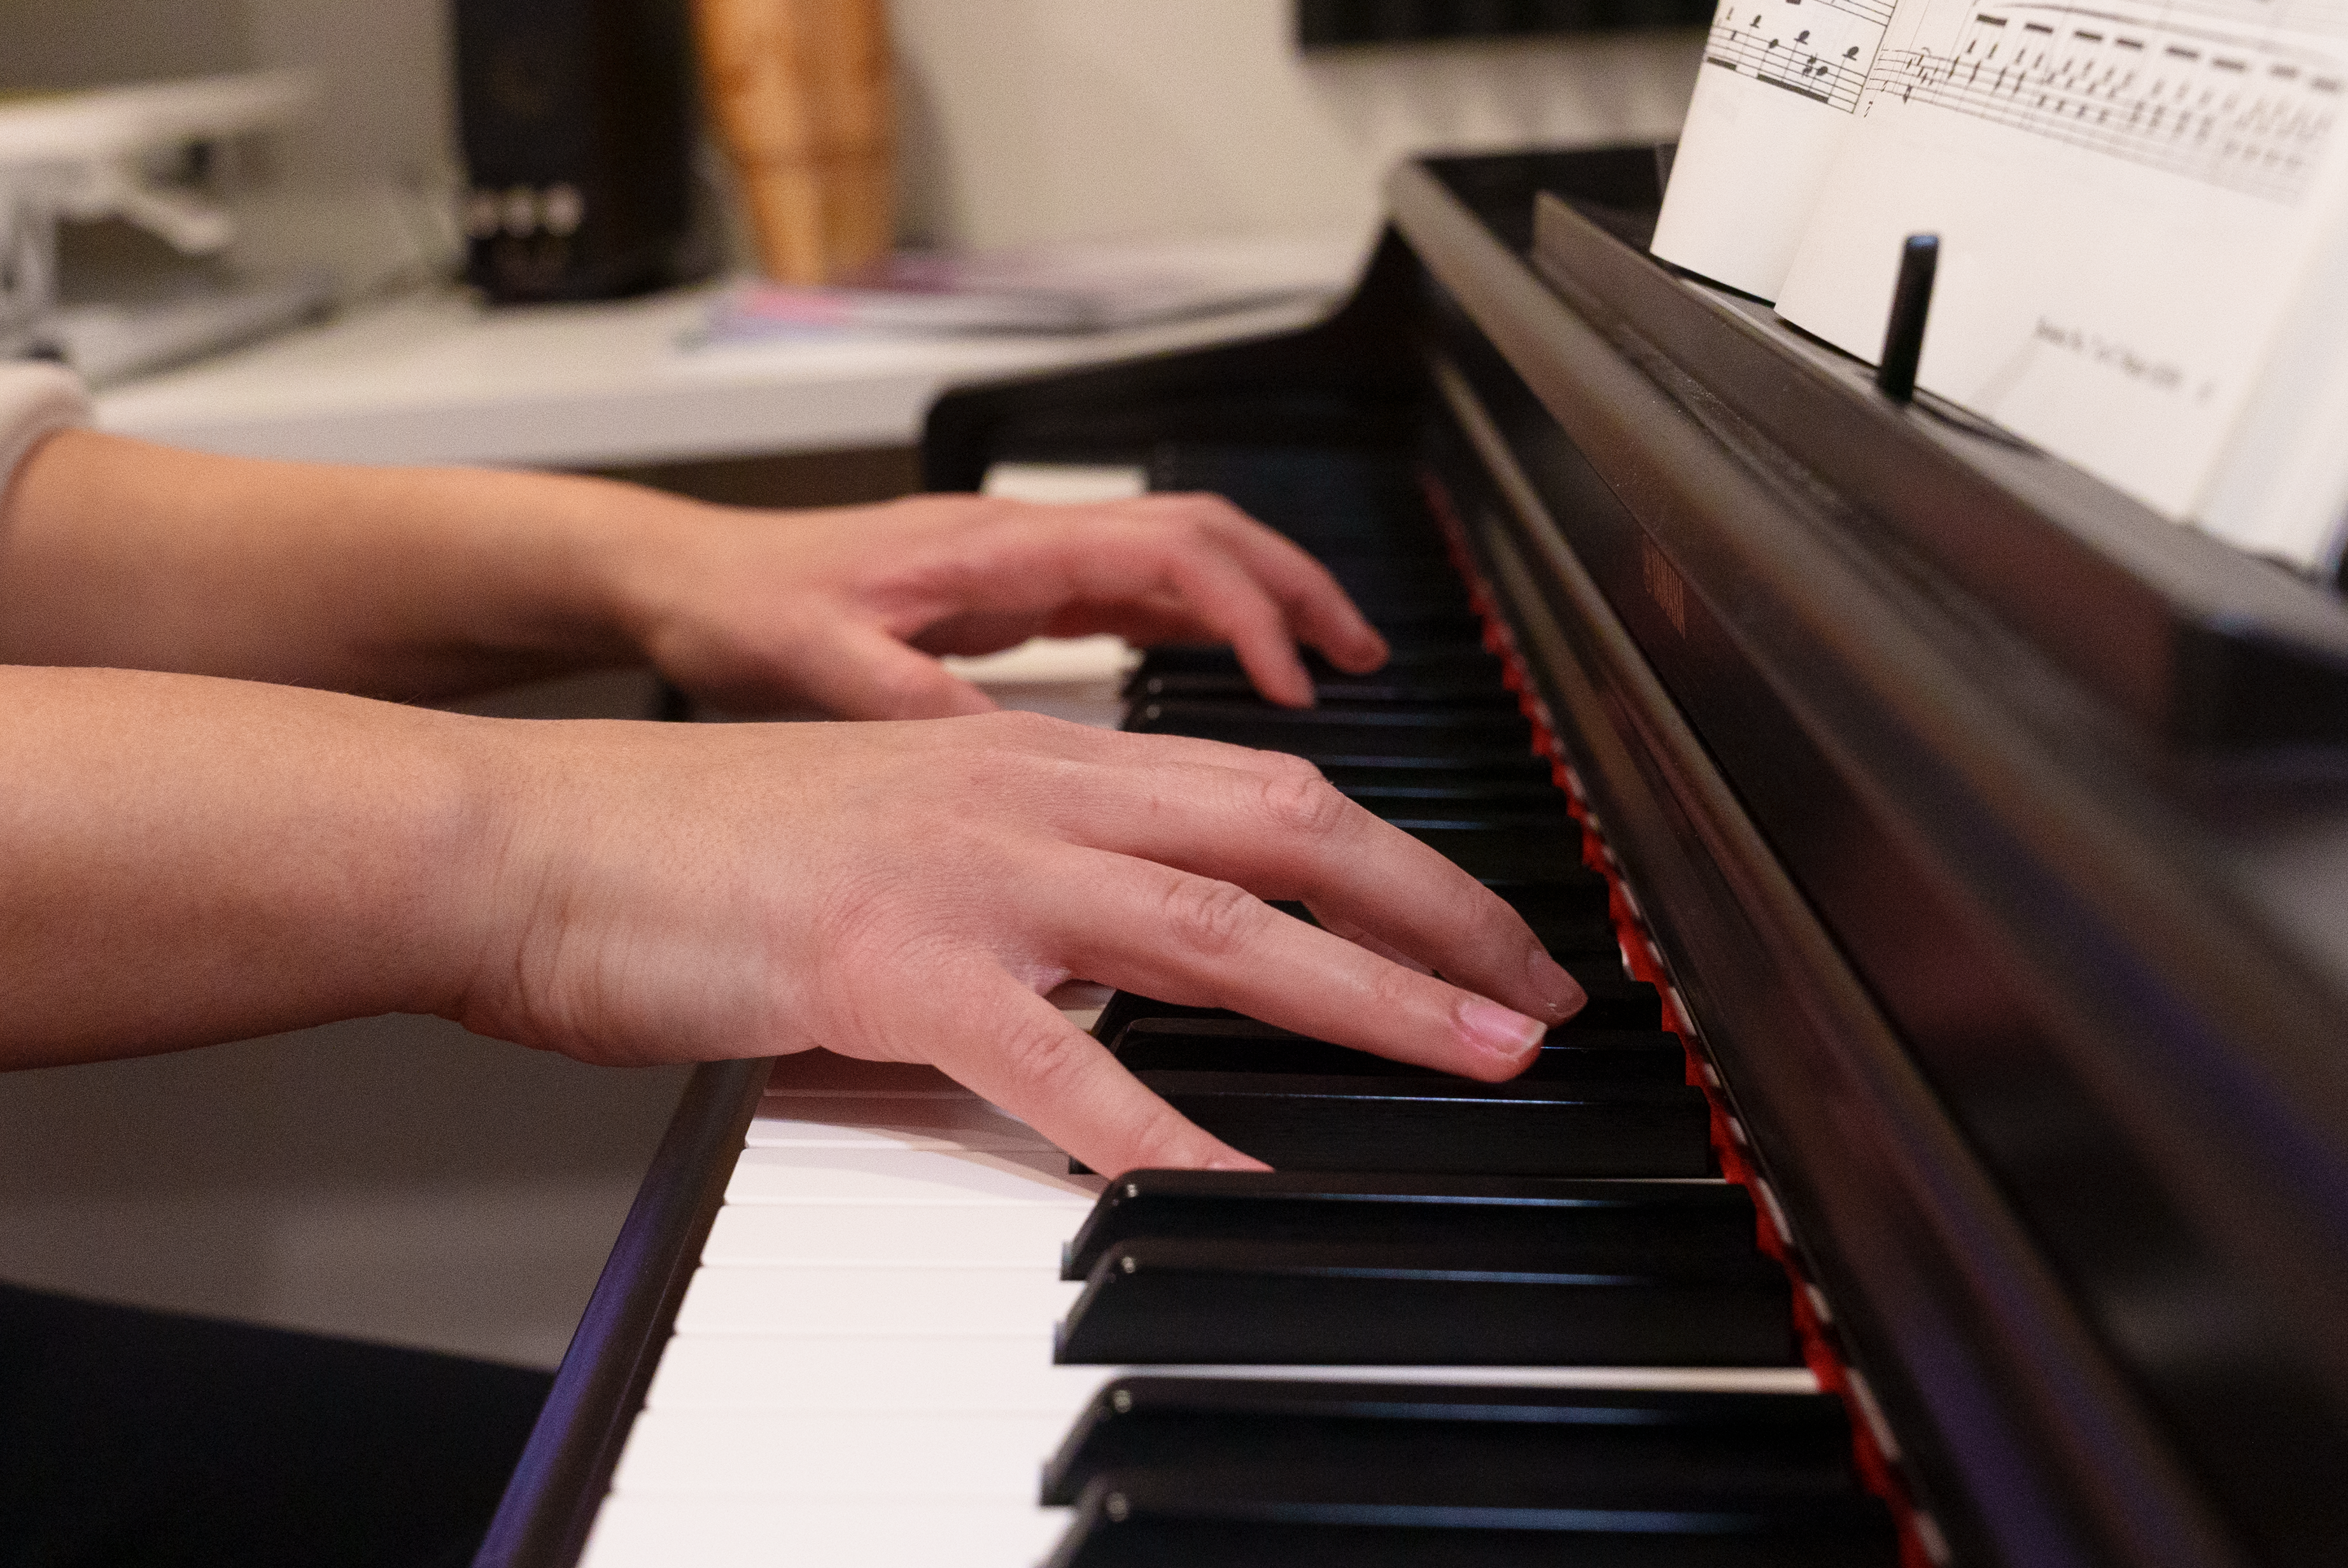
Sheet Music
Before we dive in, you can find the sheet music in the Celebration Series, 6th Edition, Level 4 Piano Repertoire book. Supporting books for the Level 4 RCM can also be found below.
 |
Technical and Musical Challenges
Despite its poetic simplicity, Dreamcatcher presents specific technical and musical challenges for the Level 4 pianist:
1. Left Hand Pattern Balance
The left hand provides a gently pulsing accompaniment pattern throughout. This repeated pattern (often a broken, open fifth) must remain even and mezzo-piano or softer, acting like a heartbeat in the background. Students may find it challenging to keep the left hand steady and controlled, but it should pulse without overpowering the melody. Achieving a good balance (right-hand melody louder, left-hand accompaniment softer) is a key skill to develop.
2. Cantabile Melody Voicing
The right hand (and occasionally the left hand) plays a singing melody that needs to be shaped expressively. One challenge is voicing the melody so that every note connects smoothly (legato) and sings above the accompaniment. Since the melody line moves between the hands in the second half, students must maintain the melodic line even as it is passed from one hand to the other. This requires careful listening and phrasing to make it sound seamless, as if one voice is simply alternating hands.
3. Pedalling for Legato
Dreamcatcher relies on the pedal to sustain its dreamy harmonies and connect the legato phrasing. For many Level 4 students, coordinating the damper pedal with hand changes is a new challenge. The pedal must be managed clearly to avoid blurring. Changes typically occur with harmonic changes, often twice or more times per measure. Students need to learn to lift and re-depress the pedal cleanly at just the right moments, so the harmonies are sustained but not smudged. Refining pedal technique, such as half-pedalling or quick clears, is an important technical focus in this piece.
4. Rhythm and Tempo Consistency
The piece is set in common time with a moderate, gentle tempo. While there may be moments of expressive rubato, the underlying pulse should remain steady. Students might rush the repetitive left-hand pattern or drag in rubato sections. It’s a challenge to maintain a consistent tempo while also giving the music a natural ebb and flow. Counting carefully (and even using a metronome in early practice) can help establish a stable tempo foundation.
5. Wide Keyboard Geography
The melody’s journey between hands means that, at times, the pieces changes in registers. There is a large hand shift between mm. 8 and 9 as we transition to the piece’s B section. The arpeggiated runs at the end of each section include hand crossings and shifts. Completing these smoothly is a minor technical challenge. Students must prepare hand movements in advance (e.g., moving the left hand up to take over a note) so that there’s no break in sound. Fortunately, the piece is not very fast, giving players time to move, but it still requires awareness and planning.
6. Expressive Dynamics and Phrasing
Musically, Dreamcatcher challenges students to play with a lot of expressivity. The dynamic range is mainly on the soft side (piano to mezzo-forte), but shaping phrases with crescendos and decrescendos is crucial to avoid a monotonous sound. Learning to use a touch of rubato (small rhythmic give-and-take) at cadence points or phrase peaks can be tricky for a Level 4 student. They must learn control because with too much rubato, the pulse is lost; too little, and the piece might sound mechanical. Fine-tuning the phrasing so that it ebbs and flows naturally is a wonderful musical challenge here.
Teaching Strategies and Lesson Plan Ideas
Here are some strategies and lesson plan ideas to help students master the notes and the nuance.
Step 1: Introduce the Context Behind the Piece
Begin by introducing the concept of a dreamcatcher. You might show a picture of a dreamcatcher and explain how it catches bad dreams, allowing only good dreams to pass through. This imagery can spark the student’s imagination about the piece’s mood. Have the student listen to a recording of Dreamcatcher'(or play it for them) with the lights dimmed or their eyes closed, and ask them to describe the mood and imagery afterwards. This primes them to play with expression from the start.
Step 2: Explore the Mode
At a lesson, demonstrate the D Mixolydian scale (D–E–F#–G–A–B–C–D). Let the student hear how it differs from a regular D major scale, which would have C♯. They might notice a slightly folk or wistful sound. At this point in the RCM curriculum, students are new to modes, so explaining how the sound of the D Mixolydian scale resembles and differs from the D major scale (same tonal centre, but more wistful sound) is a good start that can reinforce future learning.
Teachers can also encourage students to improvise a little on D Mixolydian. For instance, the teacher plays a simple left-hand drone on D, G and A (the tonic, subdominant and dominant) while the student experiments with a melody using the notes of the mode. This fun exploration builds familiarity with the tonal palette of Dreamcatcher.
Step 3: Connect to Theory and Ear Training
Integrate a quick theory lesson by analyzing a bit of the score together. Identify the primary chords used. You will find I (D major), ♭VII (C major), which are common sounds in this mode, and ♭VI (B♭ major), which is a borrowed chord for colour. This helps them understand the harmonic progression and anticipate pedal changes. For ear training, play the left-hand pattern and ask them to pick out the melody notes by ear (maybe sing and find them on piano). This reinforces their listening skills and memory (more on that below).
Step 4: Left Hand First
Have the student start by learning the left-hand accompaniment pattern on its own. Clapping the rhythm while singing the notes can help internalize this part. Since the left-hand accompaniment is repetitive, identify the pattern. Then, practice it slowly, counting aloud to stabilize the rhythm. Focus on a gentle, even tone for each repetition. You can also start by playing with a metronome, and then make a game of keeping the LH as steady as possible. Once comfortable, add the pedal to show how it sustains the sound, and practice coordinating the basic pedal changes with the left hand by ear (changing when harmony changes).
Step 5: Learn the Piece Phrase by Phrase
Divide the piece into natural phrases or sections:
|
Phrases |
|
|
Sections |
|
Teach the melody of each phrase with hands-separate practice. For example, have the student play the right-hand melody line alone in a single style. Encourage the student to sing or hum the melody as they play to shape it expressively; singing helps with phrasing. When they are comfortable, you, the teacher, can play the left hand in a duet with the student. Do the same by playing the right hand when the left hand has the melody in later sections. Emphasize the connection between notes by using finger legato and listen for a smooth line.
Step 6: Hands Together Slowly
When putting hands together, start at an ultra-slow tempo. This allows the student to place each hand’s part deliberately and to see where the melody note lines up with the accompaniment. Remind them that one hand is “foreground” (melody) and one is “background” (accompaniment). Perhaps have them exaggerate by whisper-playing the left hand and singing the right-hand notes. This will set the dynamic balance. Gradually speed up to the indicated tempo once coordination is solid.
Step 7: Teach Pedal Technique in Context
If the student is not confident with pedalling, isolate a measure or two and show how to change the pedal: press down right after playing the first harmony, then lift and press quickly when the harmony changes. You might use an exercise: play a D major chord, then a C major chord (since those are two chords commonly used in the piece), and have them practice changing the pedal between those two chords without blurring. Once they get the motion, apply it to the piece’s actual bars. Remind them to listen: if it sounds blurry, the pedal might be held too long.
Step 8: Introduce Dynamics and Rubato Early On
Encourage the student to add dynamics even while they are still learning the notes. Mark the score with hairpins where the phrase rises and falls. Similarly, discuss where a tiny bit of ritardando or stretch might feel natural (perhaps at the end of each section). Practicing these expressive elements early prevents the piece from becoming too mechanical.
Step 9: Creative Activities
To reinforce the mood, consider creative cross-overs. For instance, after learning the piece, have the student draw a picture or write a few sentences about a dream that the music makes them imagine. Or let them give the piece a subtitle based on how it makes them feel (e.g., “The Peaceful Night” or “Floating on a Cloud”). Such activities deepen their personal connection to the music, which often translates into more expressive playing.
Step 10: Consistent Review
In subsequent lessons, always review tricky spots. This could include:
- Where the melody switches hands in mm. 9-10, mm. 11-12, mm. 13-14
- Where the pedal changes quickly in mm. 12 and 14
- Hand crossovers in mm. 8 and 16
- Where the left hand shifts to the bass clef in mm. 8-9
Isolate those spots and do focused practice (e.g., have them play measure X–Y hands together five times correctly in a row, ensuring a reset between each attempt by resting their hands on their laps). When isolating, encourage the student to reflect on what the piece is about emotionally, each time before attempting to play. This can encourage expressive playing rather than approaching isolated practice as mechanical drills.
Practice Tips for Trouble Spots
Here are practice tips for common trouble spots in Dreamcatcher and how to approach them:
1. Maintaining a Steady Left Hand
If the left hand tends to speed up or unevenly accent certain beats, try the “ghost hand” technique: have the student play the left-hand pattern while gently tapping the right hand on the fallboard or their thigh in rhythm. This helps internalize the steady pulse. Using a metronome at a comfortable speed (say ♪ = 60) and focusing only on the left hand can also build consistency. Remind the student that the left hand is like a clock or a heartbeat and should be steady and unflustered, regardless of what the right hand is doing.
2. Balancing Melody vs. Accompaniment
For the issue of the left hand overpowering the melody, a great practice tip is ghost dynamics: have them play the left hand pp (extremely soft) and the right hand mf or f for practice. Exaggerate the contrast.
Another trick: practice your hands separately with dynamics, especially the left hand. Train it to stay very quiet, even when isolated.
Students can also record themselves and listen: can they hear the melody clearly on the playback? If not, they need to drop the volume of the left hand further. Remind them that a listener should almost have to strain to hear the accompaniment, as if it’s distant.
3. Clean Pedal Changes
Blurry sound is a common problem if the pedal timing is off. To troubleshoot, first ensure the student can play the piece legato without pedal (using finger legato as much as possible). If that’s secure, then the pedal is just adding resonance, not masking connections. Next, practice pedal drills on a troublesome spot: For example, if going from a D chord to a C chord, have them play D chord + pedal, then lift pedal completely and wait a split second (letting the sound clear) before playing the C chord and re-applying pedal. This exaggeration teaches the concept of clearing between harmonies. Gradually tighten the gap until the change happens quickly without a noticeable break, but still no blur. Emphasize listening as the ear should guide pedal, not just the foot.
4. Smooth Hand Transitions
If there’s a hiccup when the melody passes from one hand to the other, isolate that moment. Often, the issue is one hand not being ready in position. Practice the overlap: for instance, if the left hand plays a note and then the right hand has the next melodic note, have the right hand silently get to its note before the right hand releases. You can even have both hands briefly on the key at the moment of transfer (one playing, the other touching the next key). This overlap ensures a legato connection. Practice the hand-off by playing just the last note of LH phrase and the first note of RH phrase in succession until it's seamless. Slow-motion practice helps here. Exaggerate the connection slowly, then bring it back to tempo.
5. Rhythmic Control vs. Rubato
Some students either play too mechanically or too freely. If too unsteady or overly rubato, anchor them with the metronome in sections that should flow evenly. Once they can play in strict time, re-introduce small rubato by instructing exactly where to slow down or speed up (e.g., "stretch this half-note, then resume tempo"). Conversely, if the student is playing strictly with no breathing room, encourage them to linger on important notes. A useful exercise is to mark 2–3 spots in the music for a planned rubato (like a slight ritardando at an ending cadence or a tiny pause before a new section) and have them practice incorporating those. Reassure them that rubato doesn’t mean the whole piece wobbles. Rubato should be controlled, momentary, and usually in lyrical sections like this.
6. Dynamic Shaping to Avoid Flatness
If their playing sounds flat dynamically, go back to the story or imagery. Ask: “Which part of this phrase is the most intense or emotional?” Have them highlight that note and aim to crescendo to it, then decrescendo after it. Sometimes drawing crescendo/decrescendo lines on the score or writing in dynamic markings (even where the publisher didn’t) can remind them.
Another idea: use physical gesture. Have the student lift their arm slightly upward as the phrase grows, and lower it as the phrase dies down. The kinesthetic motion often translates into sound naturally. Also, ensure they are using the weight of the arm for louder notes and a lighter finger touch for softer notes to get a richer dynamic contrast.
7. Memory Slips
If a student is memorizing Dreamcatcher, common slip zones are where patterns change (e.g., when the left hand pattern and harmony shifts in mm. 15). To troubleshoot memory, employ segment practice: have them start from random sections (middle of the piece) to ensure they can pick it up anywhere.
They should also analyze: know “After the D chord section comes the C chord section,” etc., so that intellectually they understand the sequence of musical events.
Encourage visualization away from the piano. Can they imagine playing through the piece and identify where it goes next? Bar-by-bar memory maps (writing a brief description of each phrase) can also help: e.g., “Bars 5–8: LH continues pattern, RH repeats melody higher.” Such cues reinforce memory pathways beyond muscle memory alone.
8. Performance Nerves and Consistency
Sometimes a technically secure student might still falter in performance due to nerves (a common issue with gentle pieces where every note is exposed). To build confidence, incorporate mock performances: have the student play for a family member or in a Zoom call to simulate exam pressure.
Furthermore, practice starting the piece multiple times since the opening of Dreamcatcher needs a calm, secure beginning. The student should be comfortable with the first two measures under any circumstance. Remind them to hear the first note in their head before playing, and to take a big, relaxed breath. The simplicity of the piece means that expressivity carries it, and focusing on the musical story can sometimes take their mind off technical fear, resulting in a more confident performance.
Memory, Tone, and Phrasing Tips for Polishing
In a piece as atmospheric as Dreamcatcher, memory, tone quality, and phrasing are intertwined. Here are tips to help students internalize the music, produce a lovely tone, and shape musical phrases artistically:
1. Memorization Strategies
Dreamcatcher is relatively short, at 16 measures, and is structured into two distinct sections. Leverage this by helping students see the form. For example, since the piece is in binary form (A–B), have them memorize Section A and Section B separately, then practice linking them. Encourage thematic memory: knowing that “Section B is the part where the melody goes to the left hand” or “Section A repeats with a softer ending the second time.” This kind of narrative memory (“story of the music”) helps a lot.
Because the left-hand pattern is repetitive, students should be cautious: repeating patterns can lull one into a state of autopilot. To combat this, they can assign verbal cues to themselves for each change: e.g., say “C natural now” when the C-natural appears, or “hands switch” when the melody trades off. Another memory aid is analyzing final cadences. Knowing how it ends (e.g., “ends on a full D chord”) will prevent memory slips at the finish line.
2. Tone Production
Achieving a beautiful tone in this piece is crucial since it’s soft and lyrical. Teach students about using arm weight and gravity even in soft playing for “supported sound.” Each melody note, though quiet, should have a core to the tone (avoiding a thin, feeble sound). Have the student experiment with playing a melody note with a relaxed arm drop versus just pushing with the finger to hear the difference in richness. Often, the best tone comes from playing into the key bed with confidence, even at a piano dynamic.
Since the piece is dreamy, avoid harsh attacks: no note should sound percussive. Using finger pads (not tips) and a slower key descent can mellow the tone. The student can experiment with “brushing” the keys rather than just pressing them. How does the sound change when you brush inwards? How does it change when you brush outwards? Pedaling contributes to tone as well; a little pedal on each harmony will add a halo to the sound (just remind them not to over-pedal and blur).
3. Voicing the Melody
Good tone goes hand-in-hand with voicing. The student must project the melody without banging. One trick is to lean ever so slightly more arm weight into the melody hand and lighten the accompaniment hand. If the melody is in the right hand, perhaps the right side of the body is a bit more engaged. If the melody shifts to left hand, they need to bring that left-hand line to the forefront (which might require extra practice, since left hand voicing is often a new skill).
You can also practice voicing by isolation: have them play hands together but deliberately omit (or play very quietly) the non-melody notes, so they only hear the melody clearly. Then add the other notes back in softly. This trains the ear and fingers to keep melody dominant. Constantly ask, “Can you hear the tune singing out?” If not, adjust touch accordingly.
4. Phrasing and Breath in the Music
In a vocal, lyrical cantabile piece like this, phrases should mimic natural breath. Identify the climax of each phrase (usually the highest or loudest point) and the resolution point (often the end of the phrase). In teaching phrasing, it can help to have the student physically breathe in sync with the phrases. For instance, take a breath at the start and gently exhale as the phrase progresses, taking another small breath at the phrase break. This physical breathing often leads to a musical “breath” or lift in their playing at the right spots.
Mark phrase endings in the score (with a short vertical line or comma). Encourage a slight lift or silence between phrases (maybe a tiny break of sound or just a lighter release) to delineate them, unless indicated legato into next phrase. Additionally, discuss phrase shaping: e.g., “Phrase three starts soft, grows to mezzo-forte by bar 11, then tapers off.” Once they understand the contour, they can try to draw that shape on the piano.
5. Rubato and Flow
Phrasing is also enhanced by tasteful rubato. Reiterate that rubato should feel natural, like a singer stretching a phrase for expression. A tip is to anchor rubato to written rhythm values: for instance, if there’s a longer note at a phrase end, that’s a spot to linger a moment longer than strictly counted. Conversely, a series of running eighth-notes might push forward slightly. Practicing with a steady beat, then bending it intentionally, can help them internalize where they have rhythmic freedom. Remind them: rubato is an ebb and flow. If you slow down somewhere, you might gently catch up later, so the overall tempo doesn’t derail. In Dreamcatcher, rubato might be used at the end of sections or to emphasize a particularly heartfelt moment. Work with the student to decide on two places to use it, and keep the rest steady so it stands out.
6. Expressive Details
Finally, check for any expressive markings the composer included. Are there slurs indicating phrases? Observe them for where to lift. The tenuto marks on certain notes are clues for phrasing emphasis, suggesting leaning on it as a phrase peak. Show students how following these clues in the score will lead them to an elegant interpretation. At this level, building the habit of reading between the lines (beyond just pitches and rhythms) is key to musical phrasing.
Theory and Technical Tie-Ins
As mentioned, Dreamcatcher is a pedagogically rich composition, and there are many opportunities to connect the dots between the piece and broader theory/technical concepts.
1. Exploring Mixolydian Mode
Dreamcatcher offers a perfect introduction to modes. In RCM Level 4 theory, students do not formally study modes yet, but you can give a sneak peek. Explain that Mixolydian mode on D has the same notes as G major (one sharp: F♯) but it centers on D as the home tone. This is why the piece has a one-sharp key signature (looking like G major/E minor) yet D sounds like “do.” Emphasize the concept of the lowered 7th: C-natural instead of C♯ in the context of D. If they play a D major scale vs. D Mixolydian, they’ll hear the difference in the top (the leading tone vs. subtonic). This can lead to a mini discussion: in Mixolydian, the V chord is minor (A–C–E in D mixo, instead of A–C#–E). That gives the piece a different harmonic flavour, often using the ♭VII chord (C major chord), which you can point out in the music. Tying it to terms they know, you might say “Mixolydian is like a major scale’s casual cousin. It doesn’t lead as strongly to the end, making it sound more relaxed or folk-like.” These insights help them see theory alive in their repertoire.
2. Related Scales and Technical Exercises
Relate the piece to technical requirements they are working on. For instance, RCM Level 4 requires scales up to 4♯/♭ (D major is one of them!). Practicing the D major scale and arpeggio will indirectly benefit this piece (even though the piece is D mixo, the finger patterns for D major scale cover most notes except the C). Additionally, have them practice the G major scale (one sharp) since that is the direct source of the Mixolydian notes.
3. Chord Progressions
At level 4, students are expected to know basic triads, so identify these chords together in the score. You can even have the student play the chord progression on blocked chords to hear the backbone of the harmony and convert the music into a lead sheet. This is a great chance to review chord theory: major vs minor (all are major here due to the mode). Ask them to identify the quality of each chord they see. If a chord is not a standard I/IV/V in D major (like the C major chord), explain its function as a chord from the Mixolydian scale. For a curious student, you could mention this kind of ♭VII chord is common in pop music and gives a “modal” pop sound (lots of rock songs in major keys use ♭VII, and they’ll encounter it more in the future).
Sight-Reading and Ear Training Activities
To complement learning Dreamcatcher, here are some sight-reading and ear training activities that tie in with the piece:
1. Sight-Reading Warm-Up in D Mixolydian
Create (or find) a 8-bar sight-reading excerpt in D Mixolydian. For example, a simple melody in the treble that uses one sharp (F♯) but frequently has C-naturals, with a basic broken chord accompaniment in the bass. Have the student sight-read this, emphasizing that the key signature has one sharp but the home note is D (this reinforces recognizing modal patterns). This will train them to expect C-naturals, which is directly relevant to Dreamcatcher. After reading, ask, “Did that sound like Dreamcatcher a bit?” The student will note the similar flavour. This also builds confidence in reading pieces that aren’t strictly major or minor.
2. Left-Hand Pattern Reading
For sight-reading practice, give the student a short excerpt focusing on left-hand accompaniment patterns. Perhaps notated in bass clef: a repeated pattern of open fifths or a broken chord sequence (like D-A-D-A pattern over a few measures). This mirrors Dreamcatcher’s left hand role. By practicing sight-reading such patterns, the student gets quicker at recognizing and grouping notes (seeing D-A as a fifth, etc.).
3. Ear Training: Melody Playback
Play a short 3-4 note melody from Dreamcatcher by ear and have the student play it back on the piano. For instance, maybe take a distinctive melodic motif (if any) and transpose it or play it on a different starting note. The student should listen and try to replicate it. If they struggle, break it down: “Is the second note higher or lower? Does it move by step or skip?” This sharpens their ear for the intervals in the piece. It’s also directly useful for RCM ear tests where they have to play back a melody. Using the piece’s style (stepwise, gentle intervals) ties ear training to something familiar.
4. Harmonize a Melody
A fun activity: give the student a simple melody in D Mixolydian (or even the actual Dreamcatcher melody if it’s simple enough) and ask them to harmonize it with left hand by ear. They can use open fifths or single bass notes. Since the main chords are I (D) and ♭VII (C), see if they can find which bass note sounds right under each melody section. This is not only good ear training (listening for what bass note supports the melody), but it solidifies their understanding of the piece’s harmony. They might discover the underlying chord progression on their own. It’s like guided discovery: “What chord do you think goes with this part of the tune?” If they guess and check, their ear is being put to work.
5. Rhythm Clap-Back
Tap or clap a rhythmic pattern drawn from Dreamcatcher (for example, if a phrase has quarter-quarter-half, or a syncopated figure, etc.) and have the student clap it back or identify it. Since Dreamcatcher is rhythmically straightforward, this could be just reinforcement of keeping steady beat with a slow tempo. You can also turn the piece into a call-and-response game where you clap the original rhythm and have the student improvise a response.
6. Improvisation
This is both ear and creative skill: have an improvisation session where the teacher plays the left-hand pattern from Dreamcatcher (or a similar rolling fifth pattern) repeatedly, and the student improvises a new melody over it. They should stick to the D Mixolydian notes to keep it consonant. Encourage them to use motifs from the piece’s melody if they remember any, or to invent something with a similar mood (long, flowing notes). Then, switch! Let the student play the left hand while the teacher improvises a melody. This activity builds aural skills (listening for chord changes, matching a mood) and fosters creativity. It also gives them a deeper appreciation of how the piece is constructed, since they momentarily step into the composer’s shoes.
Questions and Answers to Prepare with Students
Depending on your studio, you may offer informal studio-wide parties and presentations. When it comes to studio discussions, it could be a good idea to have your student discuss Dreamcatcher. Here are some sample questions, along with guidance on answers student can prepare confidently.
Q: "Who is the composer of this piece, and what can you tell me about them?"
- A: “The piece was composed by Anne Crosby Gaudet, a Canadian composer and piano educator who is still living today. She writes a lot of contemporary teaching pieces. This piece is from the 21st century, so it’s a modern piece.”
- Tips for the student: Name the composer with correct pronunciation. Mention she is a contemporary composer (modern era) and perhaps her nationality (Canadian). If the student remembers, they can add that Gaudet has written many pedagogical pieces and this one was composed around 2002 (optional detail). Keeping it simple is fine: composer’s name, era (contemporary), and country.
Q: "What key is Dreamcatcher in?"
- A: “It’s actually in D Mixolydian mode. That’s like D major but with a C natural instead of C♯. D major is the tonal center, but because of the C natural we call it a mode, not a major key.”
- Tips: This is a bit tricky, but will help reinforce learning later on. If that’s too much, mentioning “The tonic and key signature is in D, but the piece commonly uses a C natural” could suffice.
Q: "What is the form of this piece?"
- A: “It’s in a binary form (two sections). There’s an A section, then a B section where the melody changes hands."
Q: "The title is Dreamcatcher. How does the music reflect that title?"
- A: “A dreamcatcher is a willow hoop with a web, from Indigenous culture, meant to catch bad dreams. This music is very dreamy and gentle, which fits the idea of nighttime and dreams. The soft, repetitive left hand might represent a peaceful heartbeat during sleep, and the melody has a lullaby-like quality, as if it’s capturing a dream. So the piece creates a calm atmosphere, just like a dreamcatcher gives a sense of safety and calm at night.”
Q: "Can you point out a technical challenge in this piece and how you addressed it?
- A: “One challenge was bringing out the right-hand melody over the left-hand accompaniment. The left hand has a repeating pattern that could overpower the tune. I worked on playing the left hand very softly and the right hand louder. My teacher had me practice hands separately to balance them, and record myself to check. Now the melody sings out. Also, coordinating the pedal was tricky at first; I had to learn where to change pedal so the sound wasn’t blurry.”
Additional Resources
Encourage your students (and yourself as a teacher) to listen to a quality performance of the piece. For instance, here’s a beautiful rendition by the composer herself on YouTube. Listening can provide insights into phrasing and mood that supplement your teaching.
As you incorporate Dreamcatcher into your teaching repertoire, the sheet music is available in the Celebration Series Level 4 Repertoire book (6th Edition). You can find that in music stores or online.
Owning the collection is great for quick reference and exploring other pieces at the same level, like those List A Baroque dances or List B sonatinas that complement Dreamcatcher.
Helpful Sources
- Anne Crosby Gaudet – Music Discoveries (Official description of Dreamcatcher) musicdiscoveries.shop
- Composer Code – Mixolydian Mode explanation (music theory context) https://composercode.com
Save on Pinterest

